How to Install Peel & Stick wallpaper
On this page you will find everything you need to know about both the Installation and Removal of the Peel & Stick Wallpaper

Getting Started
Before we begin we first need to look over your wall for any imperfections that might stop your Wall Art from laying nice and flat. Remove any picture hooks and give the wall a quick wipe to remove any dust, dirt or grease.
Important: If your wall has been painted with a Teflon or Wash & Wear paint we strongly recommend priming your wall with Viponds Prep Coat to ensure adhesive longevity.
Tip: The cleaner and smoother the surface the better your Wall Art will look and the easier it will be to install.
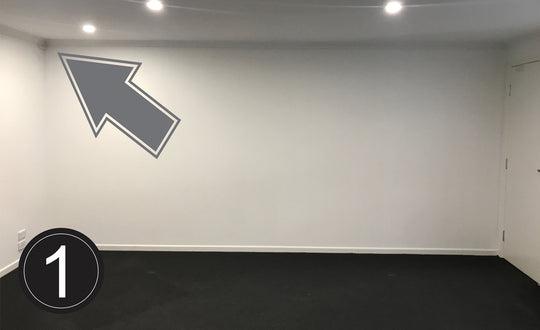
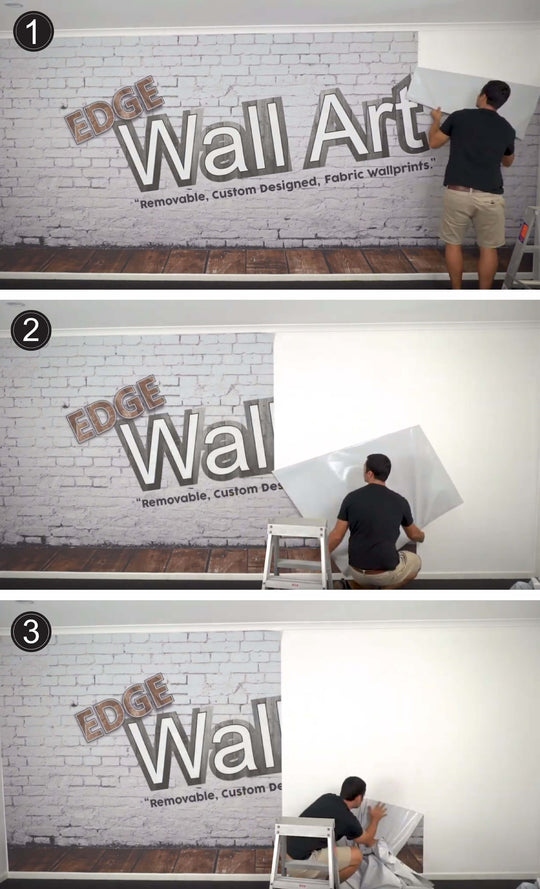
It’s crucial that you always start the installation of your Wall Art from the top left-hand side of your wall.
Panel No. 1
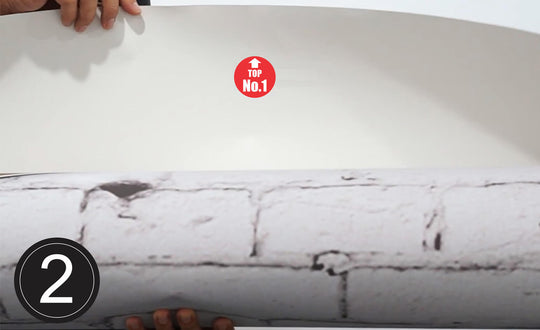
Begin with the panel labelled “No.1" (you will find the panel numbers at the top of each panel on the reverse side).
Important: Panel “No.1" is the most important panel of them all. This panel sets up how every other piece will follow on so it’s essential that this panel lines up nicely with the top of your wall (or cornice) and the side of your wall.
Tip: A lot of walls are not perfectly level along the ceiling line if yours is not, each panel comes with 30mm extra in length so you can start the panel up to 15mm above the cornice if need be this 15mm will be trimmed at the end of installation.

It’s Time To Apply
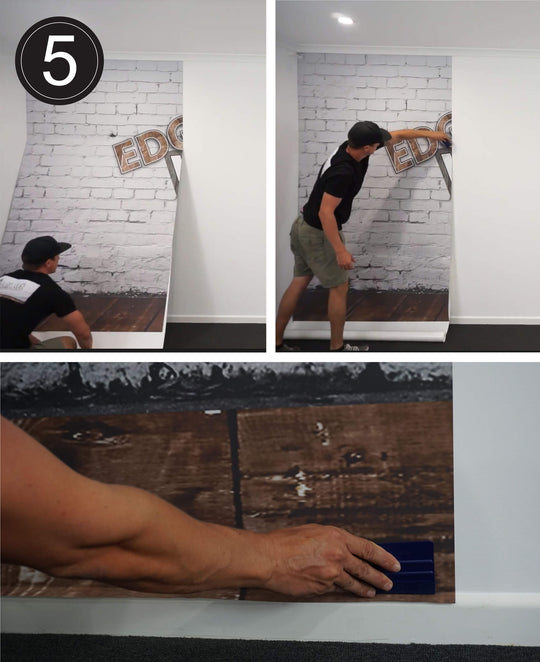
Before applying the first panel, make sure you can reach the top of your wall safely and easily. It’s always a good approach to do a dry run first just to check how well the panel fits. At this step, it’s also helpful to have a second person to assist with lining up the panel to the left side of the wall. Now that you have checked how this first panel fits lets get this Wall Art up.
While standing on your ladder or safety step position yourself at the left-hand side of your wall in front of where panel “No.1" will be placed. Unroll the entire sheet so it reaches the floor. With the help of a friend pull the backing paper down roughly 700mm or 70cm.
Tip: Do not rip the backing paper off.
Tip: You can also fold the backing paper so it creases this will allow the panel to sit flat against the wall.
Removing The Backing Paper
Once you have applied the top section of your panel (down to where the backing paper rests) reach under your wall print and pull the backing paper down to the ground. From here you have easy access to the backing sheet. Roll the backing sheet up until there is approx 400mm or 40cm of backing paper remaining on your wall print (but don’t pull the entire backing sheet off).
Hint: Keep the unstuck wall print off the wall while pulling the backing sheet down by rolling up the backing sheet on an angle towards yourself.
Now let your wall print fall flat and naturally and use your Wall Art Applicator to keep applying from where you left off. Once you reach the base of your print completely remove the backing sheet and apply the remainder of panel “No 1.”
Tip: By rolling up the backing paper it keeps the wall print from completely touching your wall, making it even easier to apply. Rolling up the backing sheet also makes working in tight spaces much easier as well.
Remaining Panels
Make sure that you look over each panel as you go for any areas that you may have missed with the applicator. It is a lot easier to fix a problem with a panel now than it is once the other panels are joined.
Now that panel “No.1" is up it’s basically the same process over again on all remaining panels.
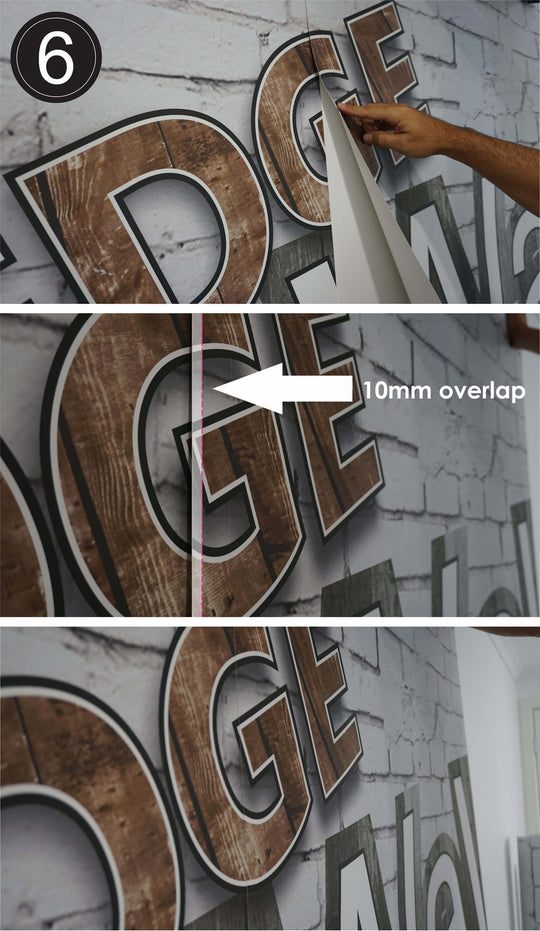
The only difference here is that now we need to overlap panel “No. 2" to panel “No.1.”
Every panel comes with a 10mm (1cm) overlap section. So what we need to do now is move your ladder or safety step over to the new section of wall where panel “No.2" will be placed. Unroll panel “No.2" and once again do a dry run just to get a feel for where this panel is supposed to line up.
Every design is different so there is not a “one size” fits all approach to the remaining panels. What we found works best is to remove the backing all the way down to a section of print that must line up (but no further than approx 2/3 of the length of the print).
Tip: It can be easier to line up panel designs if you fold the backing paper so it creases this will allow the panel to sit flat against the wall.
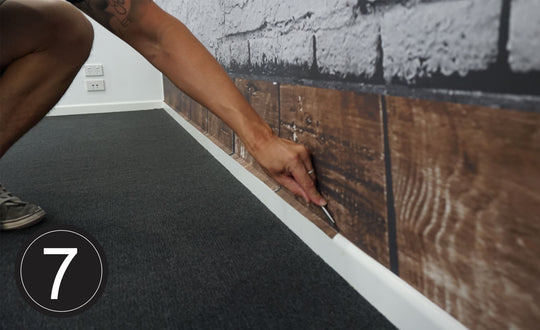
Trimming
Now that your Wall Art is up we are onto the last stage “Trimming.”
With a sharp Stanley knife and straight edge (ruler) we now need to go around the edges of the wall to remove any excess. With this step is doesn’t matter where you start all that matters is you take your time and be careful.
Hint: Make sure you go over all of the edges of your print again with your applicator to make sure the print is firmly stuck.
Once cut pull the excess print up very slowly just in case you didn’t cut right through the print in different locations.
Cutting Around a Light switch or Obstacle
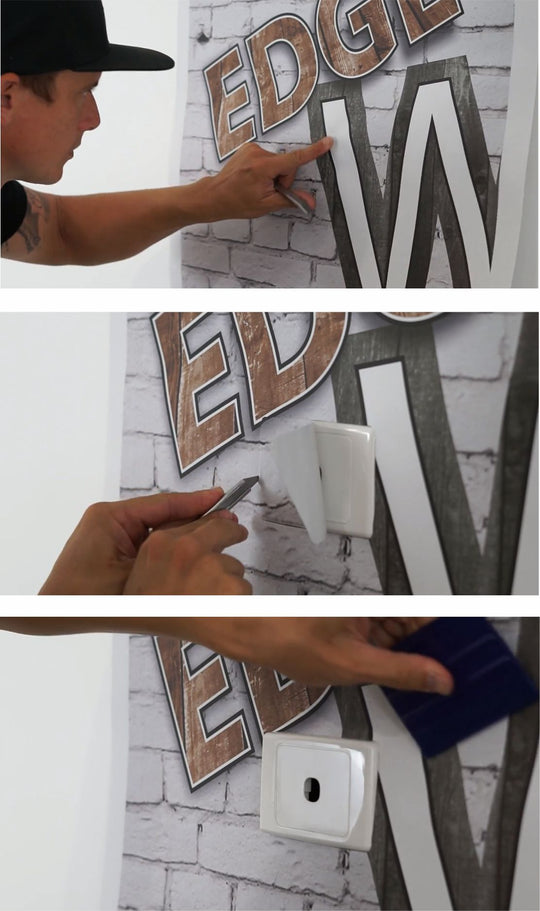
Applying around Light Switches
When cutting around a light switch, power point or similar obstacle apply your panel as per usual until you get within a 5 -10cm reach of the switch. Now we need to apply your Wall Art to just the light switch itself. With your finger apply the panel to the edges of the light switch so we get a nice outline of it (leave the surrounding areas of the panel loose).
With a sharp Stanley knife we now need to slowly and carefully cut around the edges of the light switch. Once you have made the cuts remove this piece exposing the light switch. Be careful not to over cut the area because this will result in making the hole bigger than required.
Now that the light switch is exposed carefully apply the panel around the switch with your applicator. Alternatively you can remove the light switch cover plate, cut around the switch and reapply the cover plate. In doing this you give yourself a little more room for error.
Please switch off the power when removing cover plates.
Removing Your Wall Art
Removing your Wall Art
When it comes time to removing your Wall Art it is really simple process.
Start by lifting the top far right corner and gently pull your Wall Art back on a 45 degree angle keeping the fabric close to the wall to avoid any unnecessary pressure on the underlying paintwork.
Make your way down the wall on 45 degree angles pulling lightly and slowly throughout the entire process.
Use this technique for each panel until your wall is back to it’s original state.